
WordPress Plugins are modular PHP scripts that add custom features, styling, or integrations to your website. Whether you need to boost SEO, set up an e-commerce storefront, or improve security, plugins extend the core capabilities of WordPress.
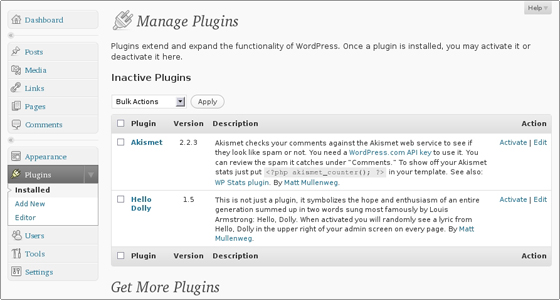
readme.txt file and check compatibility notes from the author. It is also highly recommended to take a quick backup of your database before installing any new software.
01. Dashboard Installation (Recommended)
For WordPress version 2.7 and above, the easiest way to install a plugin is directly through the administration panel:
- Download the plugin archive (.zip format) from the WordPress directory or a trusted developer's website to your computer.
- Log in to your WordPress dashboard and navigate to Plugins → Add New.
- Click the Upload Plugin button at the top, select the downloaded
.zipfile, and click Install Now.
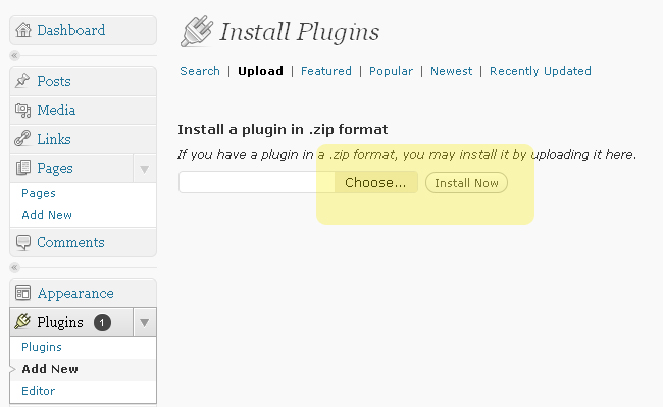
- Once the installation process completes, click Activate Plugin to enable the features on your site.
02. Manual Upload via FTP/SFTP (Advanced)
If you have a custom plugin or need to install it manually due to server upload limits:
- Extract the plugin
.ziparchive on your local computer (using tools like WinZip, 7-Zip, or your OS extractor) to obtain the plugin folder. - Connect to your hosting account via FTP or SFTP client (e.g., FileZilla).
- Upload the extracted plugin folder to the directory path:
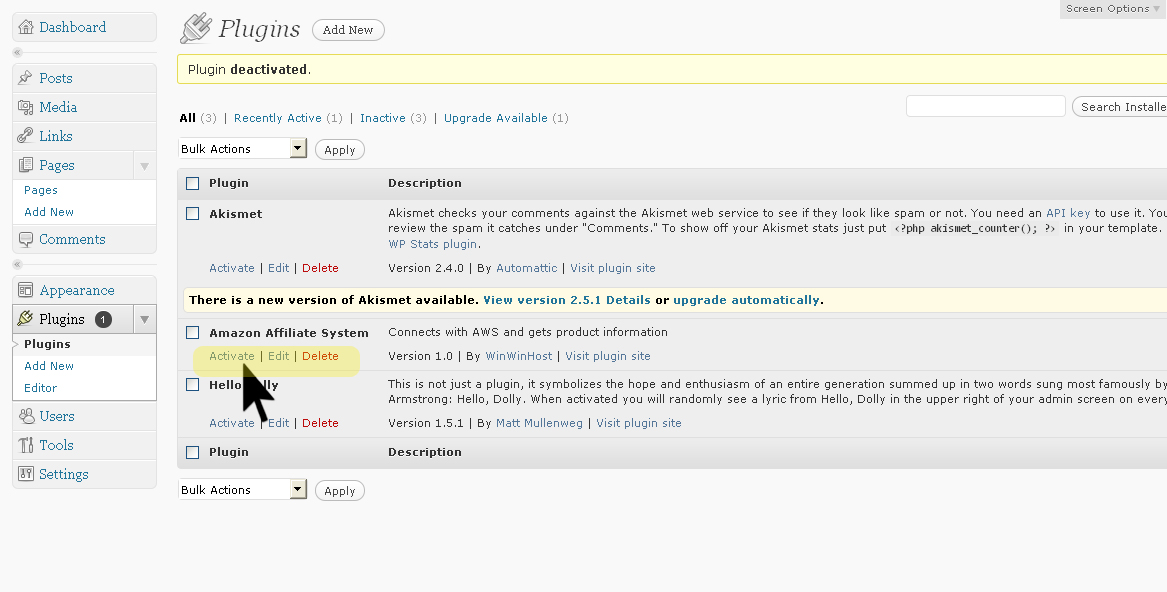
wp-content/plugins/. - Navigate to your WordPress dashboard under Plugins → Installed Plugins, locate the uploaded plugin, and click Activate.
03. Deactivating & Removing Plugins
To uninstall or remove a plugin, simply navigate to your Plugins page, click Deactivate on the respective plugin, and then click Delete.
Alternatively, you can manually delete the plugin's folder directly from the wp-content/plugins/ directory on your server.
 WinWinHost News & Tutorials
 Need Help?
 (818) 903-2338
 Email Us